

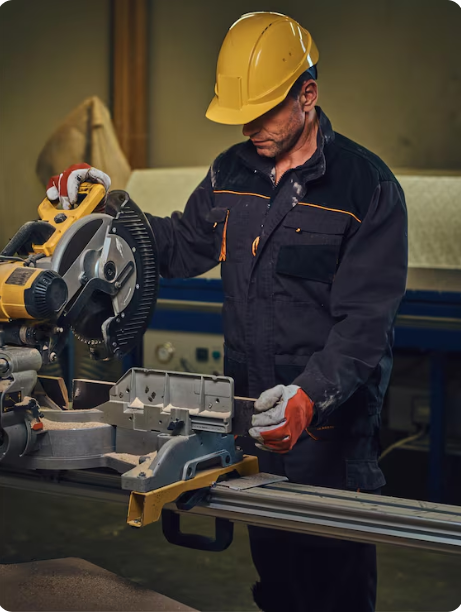
An extrusion drawing can define an excellent cross-section while leaving production questions unanswered. The press produces a continuous profile, but an OEM normally requires components with controlled length, machined holes, threads, burr-free edges, consistent finishes, and suitable packaging. If these requirements are considered only after die approval, the profile may be difficult to clamp, machine, or coat consistently. Assembly-ready aluminum profiles must therefore be planned as finished components rather than lengths of material. That means connecting cross-section design with cutting, CNC post-machining, deburring, surface treatment, inspection, and handling. This framework helps engineers and buyers prepare drawings and RFQs around the complete route.
The Press Produces a Profile, Not a Finished Component
Extrusion creates a repeated cross-section along a continuous length. The component that reaches an assembly line usually follows a longer route:
Extrusion → straightening → aging → cutting → CNC machining → deburring → finishing → inspection → packaging
Each stage affects different requirements. Cutting determines length, machining establishes local features, deburring affects insertion, finishing can alter fit, and packaging protects inspected surfaces.
The RFQ should describe the final component rather than rely on assumptions from the profile drawing.
Stage One—Design the Cross-Section for Downstream Operations
A cross-section must remain practical to extrude, hold, machine, inspect, and finish. CAD features may leave no stable fixture surface or tool access.
Datum Faces Must Exist Before Machining Begins
The profile should provide a repeatable way to orient each cut component. Engineers should identify:
- The primary surface used for machining location.
- The face or centreline that controls final assembly.
- Areas that a fixture may contact without causing damage.
- Visible surfaces that must remain free from clamp marks.
- Cavities or thin walls that require internal support.
- A feature that prevents reversed loading.
Machining and assembly datums need not be identical, but their relationship must be clear. Locating from a variable surface while controlling holes from another feature can shift position between parts.
Wall Transitions Affect More Than Extrusion Flow
Wall changes, deep slots, unsupported legs, cavities, and heavy sections affect cooling, straightness, gripping, tool access, and response to material removal.
Engineers developing custom aluminum extrusion profiles for industrial assemblies should review datum faces, wall transitions, enclosed cavities, screw ports, machining allowance, and visible surfaces before the die design is released.
Stage Two—Cutting Establishes the First Part-Level Dimension
The profile becomes an individual component at cutting. The drawing should distinguish saw length from finished length.
A cutting specification may need to address:
- Nominal finished length.
- Sawing allowance for later facing.
- End-face squareness.
- Burr direction and permitted edge condition.
- Whether one or both ends require machining.
- Orientation of asymmetric ends.
- Protection of visible surfaces during handling.
A Length Tolerance Must Match the Cutting Route
There are three common approaches:
- Saw and use: appropriate when the allowed length and end condition can be achieved directly.
- Saw and face one end: useful when one functional end requires a controlled datum.
- Saw and face both ends: appropriate when length and end relationships require machining control.
Tightening length tolerance without defining the route adds cost. State which end controls assembly and whether end geometry matters.
Stage Three—CNC Post-Machining Creates Local Function
Extrusion efficiently produces continuous grooves, ribs, channels, cavities, and screw ports. Local holes, pockets, threads, windows, end details, and sealing faces require aluminum extrusion post machining.
Machine Related Features from a Common Datum
Local features should follow a functional relationship rather than a collection of isolated coordinates:
Extrusion datum → machined face → locating hole → thread → mating component
If a locating hole and thread work together, producing them from a common datum can matter more than tightening each diameter. State whether profile variation may float away from the machined interface.
Thin Walls Need a Clamping Plan
Clamping can deform a hollow or thin-walled profile. A dimension may appear correct in the fixture, then move after release. Cutting force can also create vibration or local distortion.
A practical fixture review should consider:
- Load distribution across stable surfaces.
- Internal support for cavities where necessary.
- Protection of cosmetic faces.
- Tool access without excessive extension.
- Chip removal from enclosed areas.
- Repeatable orientation for asymmetric profiles.
The aim is enough support to control the part without changing it.
When a profile requires holes, threads, pockets, end faces, or locating features, planned aluminum CNC machining for secondary features connects continuous extrusion geometry with final assembly datums.
Stage Four—Deburring and Cleaning Determine Assembly Readiness
Machining is not complete when the tool path ends. Burrs at holes, threads, grooves, ends, and cavities may obstruct insertion, affect contact, damage wiring, or become contamination.
Not Every Edge Requires the Same Treatment
Edge requirements should distinguish among:
- A functionally sharp edge that must remain intact.
- A controlled chamfer or radius.
- A burr-free edge where minor rounding is acceptable.
- A visible edge governed by appearance requirements.
A general “break all sharp edges” note does not identify the category. Cleaning requirements should address chips, fluid, residue, and dust where relevant.
Stage Five—Surface Finishing Can Change Fit as Well as Appearance
Surface treatment is often specified by colour, but extrusion surface finish can also affect hole size, slot width, threads, electrical contact, sealing, friction, and machining marks.
Define Masking and Contact Areas Before Production
The drawing should identify areas where coating is restricted or prohibited, such as:
- Tight-tolerance holes and mating slots.
- Threads requiring predictable engagement.
- Electrical contacts and grounding locations.
- Sealing or bonding surfaces.
- Precision-machined datums.
- Areas where rack or fixture contact is acceptable.
Where coating affects a fit, the tolerance and inspection plan should state whether dimensions apply before or after finishing.
Cosmetic Acceptance Needs a Viewing Rule
Appearance requirements need visible zones. Separate primary cosmetic faces, secondary faces, and hidden surfaces, then define texture, gloss, colour, rack marks, viewing distance, and lighting where needed.
Choose the Order of Cutting, Machining, and Finishing Deliberately
The correct process sequence depends on which surfaces require protection, which features need coating, and which dimensions must remain controlled after finishing. Four common routes are:
- Cut → Machine → Finish
This route suits components whose holes, slots, threads, and machined faces require a common final surface treatment. The main risk is that anodizing or coating may change functional fits, thread engagement, or narrow clearances.
- Cut → Finish → Machine
This sequence is useful when selected interfaces must remain bare, electrically conductive, or precisely machined. However, fixtures, cutting tools, chips, and coolant can scratch or contaminate the finished surfaces.
- Machine Long Length → Cut
Machining repeated features before separating the profile can improve positioning efficiency for suitable designs. The cut ends may still require deburring, facing, finishing, or corrosion protection after separation.
- Cut → Machine → Mask → Finish
This approach is appropriate when threads, grounding points, sealing faces, or precision interfaces must remain free from coating. Mask locations, boundary conditions, and acceptable transition lines must be clearly defined.
Before anodizing or coating is approved, define the relevant extrusion surface finish requirements, including visible zones, texture, colour, masking, contact points, and dimensional interfaces.
Inspection Must Follow Three Different Geometries
Aluminum extrusion inspection should not treat the profile and final component as the same object.
Cross-Section Inspection
This stage verifies wall thickness, grooves, cavities, overall envelope, and critical relationships within the repeated section.
Part-Level Machining Inspection
This stage verifies finished length, end geometry, hole position, threads, machined faces, and the relationship between machining and extrusion datums.
Finished-Part Inspection
After surface treatment, inspection addresses functional fits affected by coating, masked areas, colour and texture, visible-face quality, cleanliness, and packaging condition.
A conforming cross-section alone does not prove that machined aluminum profiles will fit the intended assembly.
The RFQ Must Describe the Finished Component, Not Only the Profile
For reliable quotations, provide:
- A dimensioned cross-section drawing.
- A finished component drawing and 3D model.
- Alloy and temper requirements.
- Finished length and end conditions.
- Functional and inspection datums.
- Holes, threads, slots, and other machined features.
- Edge, deburring, and cleanliness requirements.
- Surface treatment and masking instructions.
- Cosmetic face classifications.
- Batch quantity and annual forecast.
- Inspection documentation expectations.
- Packaging and surface-protection requirements.
This lets suppliers quote the same scope across extrusion, machining, and finishing.
Assembly Readiness Must Be Designed Across the Entire Process
The cross-section is only the starting point for assembly-ready aluminum profiles. Reliable components require the datum, cut length, machining, edge condition, finish, inspection, and packaging to work as one route. A thin wall affects clamping, machining allowance affects the die, and coating can alter a fit. Buyers should submit both the profile drawing and finished-part requirements, including the 3D model, alloy, quantities, machined features, cosmetic zones, masking, and assembly-critical dimensions. The manufacturing team can then evaluate the complete component instead of pricing an unfinished length of material.